Key Takeaway
The Curly Girl Method helps you get healthy waves, curls, and coils by removing harsh ingredients like drying alcohols and heavy silicones. By focusing on deep hydration, gentle cleansing, and damage-free styling, you can unlock your hair’s natural texture.
Welcome to Your Dream Hair Journey
You see your reflection and wonder why your hair feels fuzzy, rough, or completely out of control. You might think your hair is just puffy, so you brush it out or heat-straighten it every single morning. What if those frizzy strands are actually beautiful curls waiting to break free?
Millions of people have found a secret that changes everything. It is a special way to care for your hair without using harsh chemicals or tools that cause heat damage. This path helps you work with your natural texture instead of fighting against it.
You do not need to be a professional stylist to understand how this works. You only need to know what your hair loves and what makes it sad. Once you learn the basic rules, you can create a routine that fits your busy life and makes you feel proud of your look. Let us jump right into how you can transform your hair starting today.
The Core Concept Behind the Method
Your hair needs moisture to stay soft and bouncy. Most regular hair products you find at the grocery store contain ingredients that strip away this moisture. Imagine washing a delicate silk dress with harsh dish soap every day. The dress would quickly become dry, dull, and frayed. That is exactly what happens to your hair when you use typical shampoos and conditioners.
The main idea here is to give up ingredients that steal moisture or coat your hair in fake shine. When you stop using these materials, your hair can finally breathe and absorb water. Water is the ultimate friend for loops, waves, and coils. By changing how you wash and style, you allow your natural shape to form without extra effort.
Ingredients You Must Avoid Starting Today
To make this routine work, you have to become a detective when you look at product labels. The back of a bottle can look like a science experiment, but you only need to look for a few specific word groups.
Regular Sulfates That Dry Your Hair
Sulfates are strong cleaning agents. They make regular shampoos create a giant cloud of bubbles and foam. While bubbles feel nice, they act like a harsh scrub that takes away every drop of natural oil your scalp produces. Your scalp needs those oils to protect your hair strands. Without them, your hair becomes a shield of frizz. Look out for words ending in “sulfate” on your bottles.
Heavy Silicones That Create Buildup
Silicones are like a plastic coating for your hair. Companies put them in conditioners to make your hair feel slippery and smooth instantly. The problem is that these silicones do not actually heal your hair. They just hide the damage.
Even worse, most silicones do not wash away with water. They stick to your hair strands and build up over time. This heavy buildup blocks real moisture from getting inside. Your hair ends up looking weighed down, greasy at the top, and dry at the bottom. Avoid words that end in “cone,” “conol,” or “xane.”
Mineral Oils and Waxes
Just like silicones, heavy waxes and mineral oils coat the hair blade. They require strong soaps to remove them. Since you are dropping strong soaps, these ingredients will trap your hair in a cage of grease. Your curls will lose their bounce and look like flat strings.
Drying Alcohols
Not all alcohols are bad, but many common ones dry your hair fast so that styling products dry quickly on your head. These specific ingredients suck the water right out of your hair shaft. Watch out for ingredients like isopropyl alcohol or denatured alcohol.
Ingredients That Your Curls Will Love
Now that you know what to throw away, let us talk about what to look for when you go shopping. Your hair will flourish when you feed it ingredients that come from nature and love water.
Gentle Cleansers
You can still clean your scalp without using harsh soaps. Look for mild cleansers made from coconuts or sugar. These ingredients remove extra dirt and sweat without disturbing your scalp’s natural balance. They will not create a massive foam, but they still do the job perfectly.
Plant Oils and Butters
Your hair needs nutrition to stay strong. Ingredients like shea butter, avocado oil, jojoba oil, and argan oil are excellent. They sink into your strands to provide deep conditioning. They also help seal in water so your hair stays soft for days.
Rich Humectants
Humectants are magical ingredients that pull water from the air right into your hair. Glycerin, aloe vera, and honey are wonderful examples of humectants. They keep your hair feeling juicy and moisturized even when the weather is warm or dry.
Discover Your True Hair Type
Before you start choosing your new bottles, it helps to understand what kind of texture lives on your head. Hair generally falls into different groups based on the shape of the strands. You might even have two or three different patterns on your head at the exact same time, which is totally normal.
Group Two: The Wave Family
Wavy hair forms gentle shapes that look like the letter S. It usually lies flatter near the scalp and curves more as it travels down toward your shoulders. This group can easily get weighed down by heavy products, so it prefers lightweight formulas.
Group Three: The Curl Family
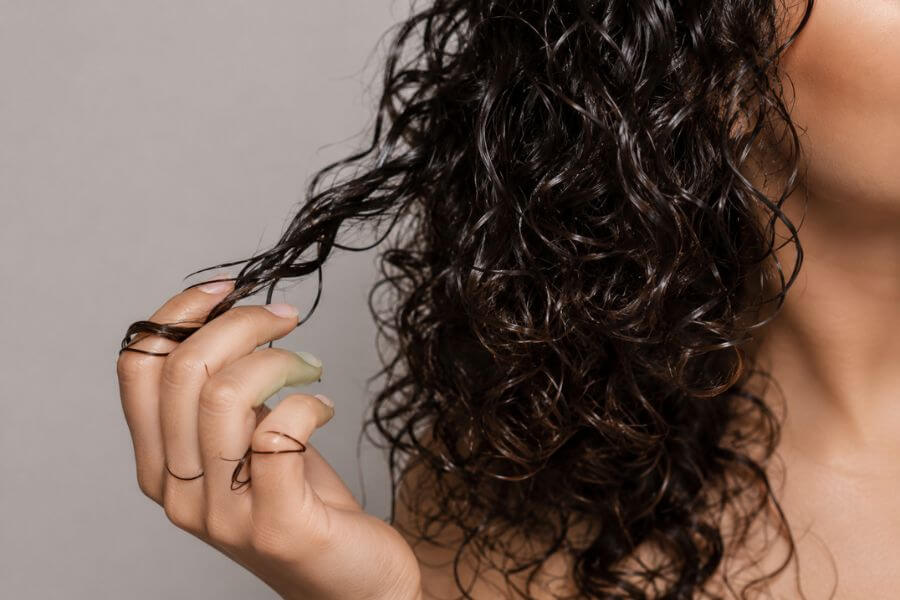
Curly hair forms clear loops and rings that look like corkscrews. These strands have a lot of natural bounce and spring back when you pull them gently. This group needs a good balance of water and light oils to keep the loops defined and shiny.
Group Four: The Coil Family
Coiled hair forms tight, dense patterns that can look like small zig-zags or fine springs. This texture is beautiful and strong, but it is also the most delicate because it dries out the fastest. It loves thick butters, rich oils, and lots of deep conditioning love.
| Hair Group | Main Shape | Best Product Texture | What It Needs Most |
| Group Two | S-shaped waves | Light liquids and foams | Volume and light hold |
| Group Three | Corkscrew loops | Medium creams and gels | Moisture and definition |
| Group Four | Tight coils | Thick butters and creams | Deep hydration and protection |
The Pre-Reset Wash: Your Final Cleanse
You cannot start this new journey without clearing the slate first. Your hair is likely full of old silicones and waxes right now. If you just start using new products, they will sit on top of that plastic shield and do nothing. You must perform one final reset wash.
For this single step, you actually need a shampoo that has sulfates but contains zero silicones. This sounds opposite to the rules, but it is a necessary step. The sulfates will scrub away all the old buildup so your bare hair can start fresh.
Wash your hair thoroughly from root to tip with this reset shampoo. Scrub your scalp with your fingertips, not your nails. Rinse it out completely with warm water. Your hair might feel a bit dry or squeaky after this, but do not worry. This is the last time it will ever feel that way.
Step One: How to Wash Without Harsh Soaps
Now you are ready for your regular routine. From this point forward, you will use one of two washing styles depending on what your scalp prefers.
Method A: The Co-Wash Style
Co-washing means washing your scalp using a special, lightweight conditioner instead of shampoo. This sounds unusual, but conditioners actually contain tiny amounts of gentle cleaning helpers.
Apply a generous amount of this conditioner directly to your scalp. Use the pads of your fingers to rub your skin firmly for several minutes. The friction of your fingers combined with the conditioner will lift away dirt, sweat, and dead skin cells. When you rinse it out, the water will carry the dirt away while leaving your scalp completely moisturized.
Method B: The Low-Poo Style
If your hair is very fine or your scalp gets oily quickly, co-washing might feel too heavy for you. In this case, you should use a low-poo shampoo. This is a shorthand term for a shampoo that has zero sulfates but uses gentle, plant-based cleansers.
Focus this soap only on your scalp. Massage it into your roots to create a low-foam lather, then let the suds run down the rest of your hair as you rinse. You do not need to scrub the ends of your hair with soap, as the runoff water is enough to clean them.
Step Two: Condition and Detangle the Right Way
Once your scalp is clean, it is time to feed your strands. This step is where the true magic happens because you will use much more conditioner than you ever did before.
Squish to Condish
Apply a handful of curl-friendly conditioner to the lower half of your hair. Your hair should feel super wet and slippery, almost like seaweed. Gently use your fingers or a wide-tooth comb to detangle your hair starting from the bottom tips and moving up to your roots. Never brush dry hair, as that causes major breakage.
Once your hair is completely knot-free, cup water in your hands and scoop up your hair from the bottom. Squish the hair upward toward your scalp. You should hear a wet, squelching sound like a wet sponge. This action forces the water and conditioner deep into the center of each hair strand. Repeat this squishing motion all around your head.
The Rinse Choice
If your hair is thick or very dry, you do not need to rinse all the conditioner out. You can leave a little bit behind to act as a shield against dry air. If your hair is wavy or fine, rinse most of it out so your hair stays light and bouncy. Use cool water for this final rinse to help smooth the hair outer layer.
Step Three: Apply Styling Products for Ultimate Definition
You should apply your styling products while your hair is still soaking wet, right inside the shower. This locks in the moisture before frizz has a chance to start.
Choosing Your Styler
Gels and foams are your best tools for creating definition that lasts. A good curl gel creates a temporary hard shell around each curl group as it dries. This shell holds the shape perfectly and keeps the hairs from flying apart. Do not be afraid of the hard shell, as you will fix that later.
Application Techniques
The easiest way to apply product is the praying hands method. Rub a quarter-sized amount of gel between your palms. Clasp your hair between your hands near the roots and slide your palms down to the ends. This smooths the product evenly without disturbing your natural curl clumps. After smoothing it on, use that upward squishing motion again to encourage the curls to form their natural shape.
Step Four: Drying Your Hair Without Frizz
How you dry your hair is just as important as how you wash it. Regular terry-cloth bath towels are too rough for delicate curls. The tiny loops on a normal towel catch on your hair strands, ripping them apart and causing instant frizz.
The Plopping Method
Instead of a regular towel, grab a clean cotton t-shirt or a smooth microfiber towel. Lay the shirt flat on a bed or a chair with the sleeves facing you. Bend over from your waist so your wet curls pile up gently on the center of the cloth.
Take the bottom edge of the shirt and place it at the back of your neck. Then, bring the top of the shirt over your head. Wrap the sleeves around your head and tie them in a knot at your forehead. This holds your hair securely on top of your head. Leave it like this for fifteen to twenty minutes. This draws out extra water without disturbing your curl shapes.
Air Drying vs Diffusing
After plopping, you can let your hair air dry without touching it. Touching wet hair causes frizz, so keep your hands away. If you are in a rush, use a hair dryer with a giant bowl attachment called a diffuser.
Set your dryer to low heat and low speed. Tilt your head to the side, place your curls gently into the diffuser bowl, and press it up toward your scalp. Hold it still for twenty seconds before moving to the next section. Do not move the dryer up and down constantly, as that creates flyaways.
Step Five: Scrunched Out the Crunch
Once your hair is one hundred percent dry, it will probably feel stiff and crunchy from the gel. This is exactly what is supposed to happen. Now it is time for the final, satisfying step.
Cup your clean, dry hands and squish your hair upward just like you did in the shower. You will feel the hard gel shell break away under your fingers. Underneath that crunch, you will find incredibly soft, bouncy, and defined curls. If you want extra shine, you can rub two drops of light oil like jojoba oil onto your palms before you start scrunching.
The Transition Phase: What to Expect
When you switch to this natural routine, your hair might not look perfect right away. This adjustment time is called the transition phase, and it can last from a few weeks to a few months.
Your scalp is used to being stripped by harsh soaps, so it might produce extra oil at first because it thinks it needs to compete. This can make your roots feel greasy for a little while. At the same time, the lower parts of your hair might look confused and fuzzy as they learn how to hold a shape without silicones.
Be patient with your head. Your scalp will eventually realize it does not need to produce so much oil, and your natural oil production will level out. Your strands will slowly heal as they drink in real moisture. Think of this time as a healing process for your hair.
Weekly Care and Deep Conditioning
Curls need extra love at least once a week to stay in top shape. Regular conditioning is great for daily maintenance, but a weekly deep treatment will truly transform your hair health.
Using Deep Conditioners
A deep conditioner is a thick mask packed with concentrated nutrients. After washing your scalp, apply this rich mask from your ears down to your ends. Let it sit on your hair for fifteen to thirty minutes while you finish your shower.
To help the product sink in even deeper, you can put on a plastic shower cap. The trapped heat from your head will open up your hair scales so the moisture can slide right inside. Rinse thoroughly with cool water afterward.
Protein vs Moisture Balance
Your hair is made of a strong protein called keratin, but it also needs water to stay flexible. Healthy hair is a perfect balance of both.
If your hair feels mushy, overly soft, or loses its curl shape fast, it likely needs protein. Look for ingredients like hydrolyzed wheat protein or silk amino acids. If your hair feels rough, brittle, and breaks easily when you pull it, it needs more moisture. Focus on rich butters and aloe vera to restore the softness.
How to Protect Your Curls While You Sleep
You spend hours getting your curls to look beautiful, only to wake up the next morning with a flattened, frizzy nest on your head. This happens because moving around on a regular cotton pillowcase creates friction and steals moisture from your hair while you sleep.
Switch to Satin or Silk
Replace your standard cotton pillowcase with a satin or silk version. These smooth fabrics allow your curls to slide easily across the surface without catching or fraying. Silk also does not absorb moisture like cotton does, so your products stay in your hair instead of soaking into your pillow.
The Pineapple Updo
If you have medium or long hair, gather your curls loosely at the very top of your head, right near your forehead. Secure them loosely with a soft fabric scrunchie. Do not wrap the scrunchie too tight, as you do not want to leave a dent.
Your hair will look like the green top of a pineapple. This technique keeps you from sleeping directly on top of your curls, protecting your definition until morning.
Simple Morning Refresh Routines
You do not need to wash your hair every single day to look put together. In fact, washing too often can dry your hair out. A quick morning refresh can bring tired curls back to life in just a few minutes.
The Water Mist Method
Fill a clean spray bottle with warm water and a small squirt of your favorite leave-in conditioner. Shake it well and lightly mist your hair until it is damp but not soaking wet. Use your hands to gently smooth down any frizzy sections, then scrunch upward to revive the bounce.
Spot Treating Tricky Sections
Sometimes, only a few pieces around your face or at the back of your head look messy. Instead of wetting your whole head, just wet those specific strands with a little water and a tiny dab of gel. Wrap the damp strand around your finger to reshape the loop, then let it air dry.
Troubleshooting Common Hair Issues
Even when you follow the rules perfectly, you might run into a few speed bumps. Most hair problems have a simple fix once you know what is causing them.
Facing Heavy Buildup
If your hair suddenly looks dull, feels sticky, or will not hold a curl no matter what you do, you probably have buildup from hard water minerals or heavy plant oils. When this happens, it is time to clarify. Use a gentle clarifying shampoo or a special apple cider vinegar rinse to strip away the film so your hair can start fresh again.
Dealing with Persistent Frizz
Frizz is usually just a curl crying out for water. If your hair looks like a halo of fuzz, try increasing the amount of conditioner you use in the shower. Make sure you are applying your styling gel while your hair is still totally wet, as applying product to damp or dry hair is a top cause of frizz.
Frequently Asked Questions
What is the main difference between co-washing and regular washing?
Co-washing uses a conditioner with gentle cleaning properties to refresh your scalp without stripping away your body’s natural protective oils. Regular washing uses harsh chemical detergents that can leave your hair feeling dry and brittle.
Can I still use my regular hair dryer with this routine?
You can use your hair dryer if you attach a large diffuser bowl to the end and turn the heat setting down to low or cool. High heat and direct air flow will blast your curl patterns apart and cause massive frizz.
How long does it take to see real changes in my hair texture?
Some people notice softer hair after just one week, while others might take several months to see their true pattern return. It depends heavily on how much damage your hair had from hot tools or chemical dyes before you started.
Do I have to buy incredibly expensive products to make this work?
No, you do not need to spend a fortune. There are many affordable drugstore options that have clean ingredients. You just need to read the ingredient labels carefully to make sure there are no secret silicones or sulfates hidden inside.
Can I do this if my hair is naturally straight?
This method cannot create curls on hair that is genetically straight because it only works to enhance the natural wave or curl patterns that you already have. However, using cleaner products will still make straight hair healthier and shinier.
How often should I wash my hair using this routine?
Most people find that washing two to three times a week is the perfect balance. This keeps your scalp clean and fresh while allowing your strands to retain their essential moisture throughout the week.