Key Takeaway
Whitening sensitive teeth at home requires a gentle, slow-paced strategy. You must focus on protecting your enamel, which is the outer layer of your teeth. Choosing non-abrasive methods, avoiding harsh chemicals, and keeping your teeth hydrated will give you a brighter smile without causing pain or discomfort.
Introduction
You want a brighter smile, but every time you think about whitening, your teeth start to ache. Sensitive teeth can make the journey to a sparkling smile feel like a painful chore. The good news is that you do not have to choose between a bright smile and pain-free teeth. You can achieve a radiant look right from the comfort of your own room without triggering that sharp, freezing sensation. Let us dive right into the best, safest methods to brighten your teeth while keeping your comfort as the top priority.
Understanding Why Your Teeth Are Sensitive
To brighten your smile safely, you first need to know what happens inside your mouth. Your teeth are not just solid, lifeless blocks. They are living parts of your body with layers. The outer layer is called enamel. This is the hard, white shield that protects your teeth from hot soups, ice creams, and biting forces.
Underneath that protective enamel lies a softer layer called dentin. Dentin is filled with millions of microscopic tubes that lead directly to the nerve of the tooth. When your enamel gets thin or wears away, these tiny tubes become exposed to the open air, food, and liquids.
When you drink something very cold or hot, the liquid travels down these tiny tubes and touches the nerve. This causes that sudden, sharp jolt of pain that makes you wince. Many standard whitening products contain strong chemicals that penetrate deep into these tubes to remove stains. For regular teeth, this might cause mild discomfort. For sensitive teeth, it can feel unbearable.
Stains happen in two different ways:
- Surface stains: These sit on the outside of your enamel. They usually come from dark colored drinks, foods, or just natural buildup over time.
- Deep stains: These sit inside the micro-cracks of your enamel or within the dentin itself.
When you try to scrub away these stains with rough products, you can accidentally scratch your enamel. Scratched enamel makes your teeth look darker because the yellowish dentin underneath starts to show through. This is why a gentle, protective strategy is the absolute best way forward.
The Danger of Harsh Whitening Methods
Many popular whitening products you see in stores or online are simply too strong for sensitive teeth. They use high amounts of a chemical called hydrogen peroxide. While peroxide is excellent at breaking up dark stains, it also opens up those tiny tubes in your dentin. This action allows the chemical to irritate the inner nerve, causing a type of pain often called “zingers.”
Other products rely on heavy scrubbing power. These are called abrasive products. Some toothpastes claim they can whiten your teeth in just a few days, but they do this by using rough particles to scrape the surface of your teeth.
Imagine using steel wool to clean a delicate glass window. The window might look clean at first, but over time, it will become covered in tiny scratches. Those scratches then catch dirt even faster than before. The same thing happens to your teeth. Rough whitening toothpastes can scrape away your precious enamel, leaving your teeth permanently sensitive and more prone to staining.
You must also be careful with trendy internet hacks. Many people recommend using raw lemon juice or apple cider vinegar to brighten teeth. This is highly dangerous for your smile. Lemons and vinegar are packed with acid. Acid melts enamel just like hot water melts ice. Once your enamel melts away, it never grows back. Your body cannot rebuild enamel. Therefore, avoiding acidic DIY tricks is a must if you want to keep your smile healthy and pain-free.
Daily Habits That Naturally Brighten Your Smile
You can actually help your teeth look brighter simply by changing how you eat, drink, and clean your mouth every single day. This approach does not require any special chemicals. It focuses on preventing new stains and wiping away surface discoloration before it sticks.
The first habit to adopt is the rinse-and-swish method. Whenever you eat dark colored foods like berries, tomato sauce, or soy-sauce dishes, drink a glass of water immediately afterward. Swish the water around your mouth for ten seconds and spit it out or swallow it. This washes away the staining pigments before they have a chance to bond with your enamel.
Another great habit is using a straw. When you drink dark juices, chocolate milk, or iced teas, the liquid washes over your front teeth. By using a reusable silicone or bamboo straw, you direct the liquid past your front teeth straight to the back of your throat. This keeps the staining liquids away from your most visible teeth.
You should also look at the types of foods you eat. Crunchy fruits and vegetables act like natural, gentle toothbrushes. Foods like apples, celery, and raw carrots require a lot of chewing. As you chew, the crisp fibers gently rub against your teeth, lifting away loose plaque and food particles. Eating these foods at the end of a meal helps clean your mouth naturally.
Here is a quick look at foods that help versus foods that stain:
| Smile-Friendly Foods | Stain-Causing Foods |
| Apples | Blackberries |
| Carrots | Blueberries |
| Celery | Tomato Sauce |
| Cucumbers | Soy Sauce |
| Cheese | Dark Sodas |
| Yogurt | Fruit Juices |
Safe At-Home Whitening Methods
Now let us explore the actual methods you can use at home that will give you a brighter smile without causing a single zinger. These methods take a little more time to show results compared to harsh chemicals, but they keep your teeth completely safe.
Hydrogen Peroxide with a Low Percentage
If you want to use a real whitening gel or strip, you must look closely at the ingredient label. Choose products that contain no more than three percent to six percent hydrogen peroxide. Many standard products contain ten percent to twenty percent, which is far too strong for you.
Low-strength strips or gels work at a slower pace. They gently dissolve stains without rushing into the deeper layers of the tooth. When using these, always follow the clock. If the box says to leave the strip on for fifteen minutes, do not leave it on for thirty minutes thinking it will work better. Stick strictly to the instructions to protect your nerves.
Custom-Fit Trays Over One-Size-Fits-All
If you use a whitening gel, the delivery system matters immensely. Cheap, hard plastic trays that come in standard kits often do not fit your mouth correctly. The whitening gel can easily squeeze out of the tray and smash against your gums. This causes chemical burns on your pink gum tissue, leading to redness, soreness, and even more sensitivity.
Instead, look for moldable trays that you soften in warm water to fit the exact shape of your teeth. Better yet, you can ask a dental professional to make a custom tray for you to take home. A tray that fits perfectly keeps the gel locked onto your teeth and away from your sensitive gums.
LED Light Technology with Gentle Gels
Some home kits include a blue LED light device that you place in your mouth. The light itself does not whiten your teeth; rather, it activates the gel and speeds up the stain-breaking process.
When combined with a low-peroxide or peroxide-free gel, this can give you a noticeable boost without requiring the gel to sit on your teeth for a long time. Shorter exposure times mean less opportunity for your teeth to become irritated.
Natural and Gentle Alternatives
If you prefer to stay away from chemicals entirely, there are several gentle, natural options that work wonderfully for sensitive teeth.
Baking Soda and Water Paste
Baking soda is a classic home remedy for a reason. It is a very mild powder that dissolves easily in water. It is much less rough than the cleaning agents found in standard whitening toothpastes.
To use it safely, mix a tiny pinch of baking soda with a few drops of water in a small cup until it forms a smooth, runny paste. Use a soft-bristled toothbrush to gently wipe this paste over your teeth for one minute, then rinse thoroughly with warm water. Because it is alkaline, baking soda also helps lower the acid levels in your mouth, which protects your enamel from melting. Use this method only once or twice a week to ensure you do not overdo it.
Oil Pulling with Coconut Oil
Oil pulling is an ancient technique that has gained a lot of popularity recently. It involves taking a tablespoon of organic, cold-pressed coconut oil and swishing it around your mouth. Coconut oil contains lauric acid, which is excellent at fighting bad bacteria that cause plaque buildup.
As you swish the oil through your teeth, it acts like a magnet, pulling out oil-soluble toxins, bacteria, and surface stains. The key here is patience. You need to swish the oil for ten to fifteen minutes. Do not swallow the oil, as it becomes full of bacteria as you swish. When you are done, spit it into a trash can so it does not clog your bathroom pipes, and rinse your mouth with warm water. This method is completely pain-free and leaves your teeth feeling smooth and clean.
Activated Charcoal with Caution
Activated charcoal is a very porous black powder that can trap stains in its tiny pores. However, you must be incredibly careful with it. Never scrub your teeth with raw charcoal powder, as it can be too abrasive for sensitive teeth.
Instead, look for highly refined charcoal toothpastes that are specifically rated low on the abrasion scale, or mix a tiny bit of charcoal powder into a lot of water to create a watery rinse. Swish it around and spit it out. This allows the charcoal to absorb surface oils and stains without physically scratching your enamel.
Let us compare these gentle methods to see how they match up:
| Method | How It Works | How Often to Use | Sensitivity Risk |
| Low-Peroxide Strips | Chemical stain breakdown | Once a day for a week | Low to Medium |
| Baking Soda Paste | Mild physical polishing | Twice a week maximum | Very Low |
| Coconut Oil Pulling | Lifts bacteria and plaque | Every day if desired | Zero |
| Charcoal Rinse | Absorbs surface toxins | Once a week maximum | Low |
Setting Up a Sensitivity-Safe Routine
To get the best results without pain, you should build a daily routine that reinforces your teeth while you brighten them. You cannot just whiten your teeth and ignore regular care; you must actively strengthen your enamel at the same time.
In the morning, brush your teeth with a dedicated sensitivity toothpaste. These toothpastes contain special ingredients like potassium nitrate or stannous fluoride. Potassium nitrate works by traveling down those tiny dentin tubes to calm the nerve of your tooth, acting like a shield against pain signals. Stannous fluoride works by physically blocking the openings of the tubes. It takes about two weeks of daily use for these toothpastes to start working, so be patient.
After brushing, use a alcohol-free mouthwash that contains fluoride or calcium. Alcohol dries out your mouth, and a dry mouth cannot fight off stains or bacteria effectively. Fluoride helps rebuild weak areas in your enamel, making it harder for stains to penetrate.
In the evening, if you choose to use a mild whitening strip or a baking soda paste, do it after you have cleaned your teeth thoroughly. Whitening products work much better when they do not have to fight through a layer of food or plaque.
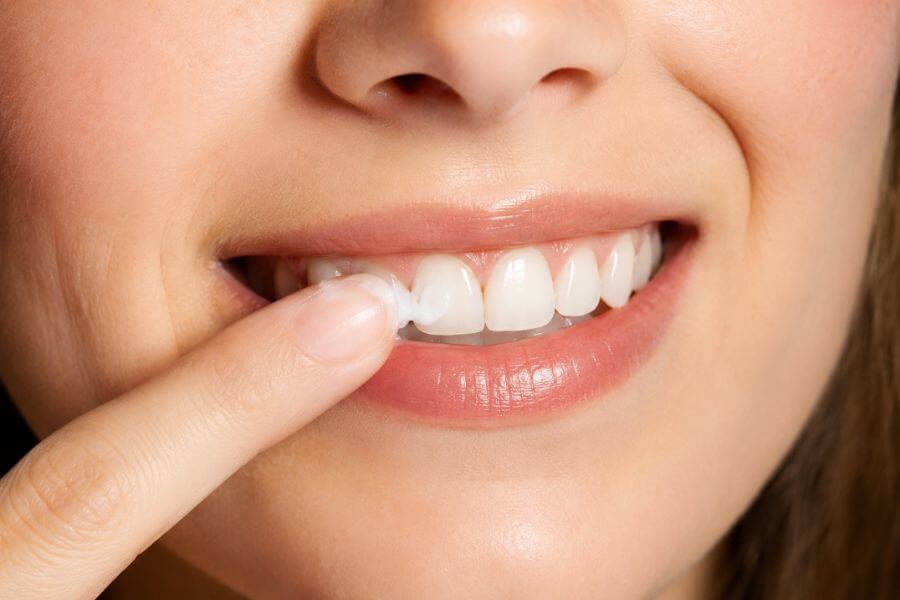
After your gentle whitening session, do not brush your teeth immediately with regular toothpaste. Your enamel can be slightly softened right after whitening. Wait about thirty minutes before doing your final nighttime rinse, or apply a small drop of sensitivity toothpaste directly onto your teeth with your finger and leave it on overnight to soothe the nerves.
How to Handle Whitening Zingers
Even with the most careful plan, sensitive teeth can sometimes react with a sudden “zinger” or sharp flash of pain. If this happens to you while you are whitening, do not panic. There are clear steps you can take to calm your mouth down immediately.
First, stop the whitening treatment right away. Take off the strip or remove the tray and rinse your mouth multiple times with lukewarm water. Do not use freezing cold or hot water, as extreme temperatures will make the pain much worse. Lukewarm water will wash away any leftover gel without shocking your nerves.
Next, apply a generous layer of sensitivity toothpaste directly over the areas that hurt. Use a clean finger or a cotton swab to coat the teeth. Leave it there like a mask for ten minutes before spitting it out. Do not rinse the residue away completely; let the calming ingredients sit on your teeth.
You should also pause any further whitening efforts for at least a few days. Give your teeth a break to recover and let the dentin tubes close back up naturally. Whitening is a slow process, not a race. Taking a three-day break will not ruin your progress, but it will save you from unnecessary discomfort.
The Role of Professional Guidance
While this guide focuses on what you can do at your own house, you should always keep your dental professional in the loop. Before you start any whitening plan, it is a smart move to get a standard dental check-up.
A dental professional can look closely at your mouth to make sure your sensitivity is not being caused by a hidden problem. Sometimes, sensitive teeth are caused by:
- Unnoticed cavities: A cavity is a hole in your tooth. If whitening gel gets into a cavity, it goes straight to the nerve and causes intense pain.
- Receding gums: This is when your gum line drops down, exposing the root of your tooth. The root has no enamel protection at all, making it extremely sensitive to whitening products.
- Cracked fillings: Old fillings can crack or leak, allowing whitening agents to seep underneath.
If your dental professional gives your mouth a clean bill of health, you can move forward with your home whitening plan with total confidence. They can also recommend the absolute best low-strength products that are safe for your specific smile.
Frequently Asked Questions
Why do my teeth feel sensitive when I try to whiten them at home?
Your teeth feel sensitive because whitening products contain ingredients that enter the tiny pores and microscopic tubes inside your teeth. If your outer layer of enamel is thin, these ingredients can easily travel down the tubes and irritate the main nerve of your tooth. This causes a sharp pain or general aching feeling.
Can I use baking soda every single day to brush my teeth?
No, you should not use baking soda every day. While it is a great natural cleaner, using it daily can eventually wear down your enamel because it is still a physical powder. It is best to use a baking soda paste only once or twice a week to keep your enamel safe and strong.
How long does it take to see results with low-strength whitening products?
When using safe, low-strength products, it usually takes between two to three weeks to see a noticeable difference in your smile. This slower pace is much safer for your nerves and helps you avoid the sharp pains caused by high-strength, fast-acting chemicals.
Is it safe to use white vinegar or lemon juice to whiten my teeth?
No, it is not safe at all. White vinegar and lemon juice are highly acidic. Acid destroys your enamel very quickly. Once your enamel is gone, it cannot grow back, which leaves your teeth permanently yellow and highly sensitive. Always avoid acidic home remedies.
What should I do if a whitening strip causes a sudden sharp pain?
If you feel a sharp pain, take the whitening strip off your teeth immediately. Rinse your mouth thoroughly with lukewarm water to remove any remaining gel. Then, rub a small amount of sensitivity toothpaste directly onto the painful teeth and leave it there to calm the nerves.
Does coconut oil pulling actually whiten sensitive teeth?
Coconut oil pulling helps whiten teeth by lifting away the sticky plaque and bacteria that trap everyday stains. It does not bleach the inside of your teeth like chemicals do, but it makes the outside look cleaner, shinier, and brighter without causing any sensitivity.
Should I brush my teeth right before or right after using a whitening product?
You should brush your teeth gently with water or a soft brush before whitening to remove any food or plaque so the product can touch your teeth evenly. Do not brush immediately after whitening, as your enamel can be slightly soft right after treatment. Wait about thirty minutes before brushing normally.
Can children or teenagers use home whitening kits?
Younger people should be extremely careful with whitening products. Their teeth have larger nerve chambers, which makes them much more sensitive than adult teeth. It is always best for younger audiences to stick to natural methods like oil pulling, proper brushing, and crunchy vegetables rather than using chemical kits.
What ingredient should I look for in a toothpaste to help with my sensitivity?
You should look for toothpastes that contain potassium nitrate or stannous fluoride. These ingredients are designed to block the tiny pathways to your nerves or calm the nerve signals directly, protecting your teeth from pain while you work on brightening your smile.
Can I drink hot cocoa or cold juice right after whitening my teeth?
It is best to avoid very hot or very cold drinks for at least a few hours after whitening. Your teeth are more porous and vulnerable right after a treatment, so extreme temperatures can cause sudden pain. Stick to lukewarm water for a little while to remain completely comfortable.