Key Takeaways
Before diving into the full routine, here are the most important things to remember to get that beautiful, cloud-like finish:
- Hydration is Mandatory: Soft matte skin is not dry skin. You must prep your face with a light, watery moisturizer so your skin looks alive beneath the makeup.
- Thin Layers Win: Never pile on heavy makeup. Apply very small amounts of liquid, cream, and powder products, building them up only where you need them.
- The Magic Is in the Blur: Use a damp sponge to press products into your skin rather than wiping them across your face. This creates a filtered appearance.
- Target Your Powder: Only apply loose translucent powder to areas that get extra oily, like the center of your forehead, nose, and chin. Leave the perimeter of your face slightly more natural.
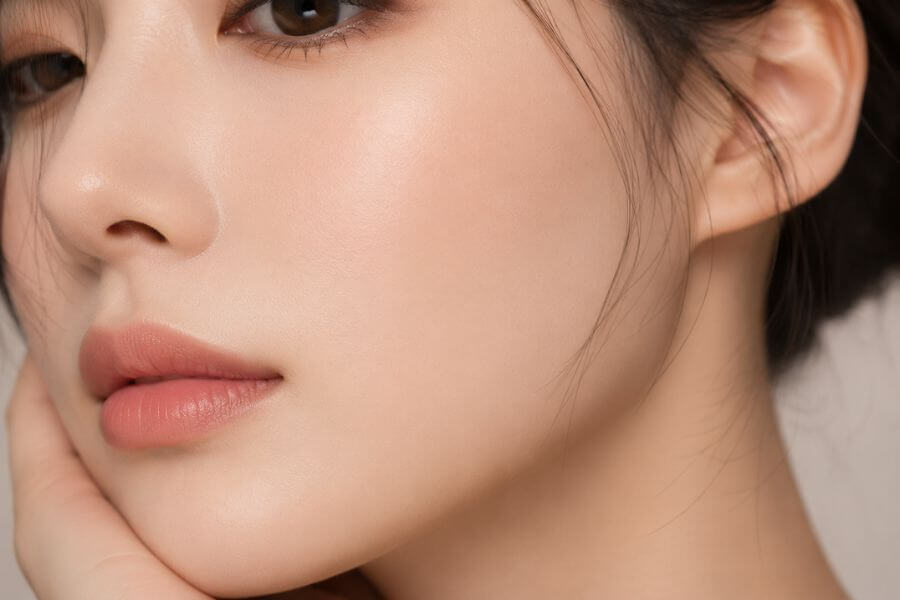
Have you ever looked at a photograph and wondered how someone’s skin could look so smooth, velvety, and completely real all at the same time? That is the magic of the soft-matte trend. Unlike the heavy, flat makeup looks of the past, this modern style gives you a cloud-like finish. It lets your natural skin texture show through while gently softening any bumps, pores, or redness. It is the ultimate balance between a healthy glow and a shine-free look.
Achieving this style does not require professional skills or a massive collection of expensive cosmetics. It is all about choosing the right formulas, prepping your skin correctly, and using the right application methods. Let us walk through every single step to help you master this beautiful style.
Understanding the Soft Matte Look
To create this style, you first need to know exactly what it is and what it is not. Many people hear the word matte and immediately think of dry, chalky, or cakey skin. This new style is completely different because it focuses on a velvety finish that still catches the light in a gentle way.
Matte Versus Soft Matte
Traditional matte makeup blocks out all light reflection. It uses heavy powders and thick liquids to absorb every bit of oil on your face. This can sometimes make skin look flat, dull, or older than it really is.
Soft matte, on the other hand, mimics the natural texture of a flower petal. It controls unwanted shine in the center of your face but allows a soft, healthy hydration to peek through on your cheekbones. It looks dimensional, lightweight, and completely effortless.
Why Skin Blurring Works
The secret to a filtered look is light diffusion. When your skin is dry or uneven, light hits it and casts tiny shadows, which makes pores and bumps look larger. By using products that scatter light smoothly across your face, you create an optical illusion that makes your skin look perfectly smooth.
Preparing Your Canvas
You cannot achieve a smooth finish without taking care of the skin underneath. Think of your face like a canvas for a painting. If the canvas is rough, the paint will not look smooth. This skin prep routine will get your face perfectly ready.
Cleansing the Right Way
Always start with a clean face. Use a gentle, milky wash that removes dirt without stripping your natural oils. If your skin feels tight or dry after washing, your cleanser is too harsh. Pat your face dry with a clean towel instead of rubbing it.
Layering Your Hydration
The key to a velvety finish is putting moisture under your makeup. This prevents your skin from producing excess oil later in the day.
- Hydrating Toner: Pat a small amount of a watery toner into your skin using your hands. Look for ingredients like glycerin or hyaluronic acid.
- Light Serum: Apply a gentle serum to plump up your skin cells. This fills in fine lines naturally.
- Gel Moisturizer: Finish with a water-based moisturizer. Heavy creams can cause your makeup to slide around, but a gel absorbs quickly and leaves a smooth surface.
Sun Protection for Smooth Skin
Sunscreen is a step you can never skip. For this specific style, look for a sunscreen that has a fluid or satin finish. Avoid greasy sunscreens that leave a heavy white shine on your face, as this will destroy the velvety effect you want to build.
Choosing the Best Products
The items you select will make a massive difference in how your final look turns out. You want to look for specific words on the packaging and avoid products that will conflict with each other.
Base Product Textures
When shopping for foundation or skin tints, read the labels carefully. Look for words like velvet, demi-matte, natural finish, or blurring. Avoid anything that says high-gloss, ultra-dewy, or maximum matte.
The Role of Primers
A good primer is like a real-life filter. For a soft look, you have two choices depending on your skin type. You can use a pore-minimizing primer that fills in deep texture, or a smoothing primer that creates an even surface for your foundation.
Cream Versus Powder
A common mistake is using only powder products. To keep the look soft and modern, you should use cream blushes, cream bronzers, and liquid concealers first. Powders should only be used at the very end to set everything in place.
The Step-By-Step Application Routine
Now that your skin is prepped and your products are ready, it is time to apply your makeup. Follow these steps in order to get the most seamless finish possible.
Step 1: Spot Priming
Do not smear a blurring primer all over your entire face. This can make your makeup look heavy. Instead, take a pea-sized amount of primer and press it only into the areas where you have visible pores or extra shine. For most people, this is the nose, the chin, and the space on your cheeks right next to your nose. Use your ring finger to gently tap the product into place.
Step 2: Applying Your Skin Base
Grab a lightweight skin tint or a medium-coverage foundation. Dot a tiny amount onto the center of your face and blend outward toward your hairline.
The tool you use matters immensely. A damp makeup sponge is the best choice here. The moisture in the sponge keeps the product looking skin-like, while the bouncing motion presses the makeup into your skin rather than letting it sit on top.
Step 3: Precise Concealing
Only use concealer where you absolutely need it. This keeps the rest of your skin looking light and fresh.
Apply a small dot under your eyes to hide tiredness, and a tiny dab on any red spots or blemishes. Let the concealer sit on your skin for thirty seconds before blending it. This allows it to thicken slightly, giving you more coverage with less product. Blend the edges out smoothly with your damp sponge.
Step 4: Adding Color and Warmth
Before reaching for any powder, apply your cream bronzer and cream blush.
- Cream Bronzer: Warm up the perimeter of your face by sweeping a cream bronzer across your forehead, your cheekbones, and your jawline. Blend it upward to lift your features.
- Cream Blush: Apply a soft pink, peach, or berry cream blush to the apples of your cheeks and blend it back toward your hairline. Cream products blend into the foundation beautifully, creating a glow that looks like it is coming from inside your skin.
Step 5: The Micro-Powdering Method
This is the most critical step of the entire routine. Traditional baking involves putting a massive amount of powder on your face and letting it sit. This will make your skin look dry and dusty. Instead, use the micro-powdering technique.
Take a loose translucent powder and press a clean powder puff into it. Tap the puff on the back of your hand until you cannot see any white dust on the fabric. The powder is now pressed into the puff. Gently press this puff onto your oily areas. This sets your makeup and removes shine while keeping your skin looking completely smooth and air-blurred.
Adjusting the Look for Your Skin Type
Everyone has unique skin, which means you might need to tweak this routine slightly to make it work perfectly for you.
Tips for Oily Skin
If your skin gets oily quickly, focus on oil-control steps during your prep. Use a clarifying toner before your moisturizer. You can also apply a very thin layer of loose powder before your foundation, and then another layer at the end. This double-powder method acts as a shield against excess oil.
Tips for Dry Skin
If you struggle with dry flakes, you need to be very careful with powder. You can completely skip powdering your cheeks and forehead. Only use a tiny makeup brush to apply powder to the sides of your nose and your chin. Make sure your gel moisturizer is fully absorbed before you start your makeup.
Tips for Combination Skin
Combination skin means you have both oily zones and dry zones. Treat these areas like separate parts of a puzzle. Use a pore-blurring primer on your oily nose, but use a extra-hydrating primer on your dry cheeks. This customized approach ensures your whole face looks balanced.
Choosing the Right Makeup Tools
The best products will not look good if you apply them with the wrong tools. Having a few dependable brushes and sponges will change the way your makeup looks.
Sponges Versus Brushes
A dense foundation brush is fantastic for getting high coverage, but it can sometimes leave streak marks on your face. A makeup sponge provides a softer, more blurred finish. If you prefer brushes, always finish your routine by gently tapping a damp sponge over your face to remove any brush lines.
Powder Puffs
A fluffy powder brush is great for a light dusting of product, but a velvet powder puff is the ultimate tool for a blurred aesthetic. The flat surface of a puff presses the powder directly into the pores, flattening the surface of your skin and instantly erasing shine.
Tool Maintenance
Clean your tools regularly. A dirty sponge gathers bacteria, skin cells, and old makeup. This can cause breakouts and make your foundation look patchy or uneven when you apply it. Wash your sponges after every few uses with a gentle soap.
Finishing Touches for Cohesion
To complete the soft-matte look, the rest of your makeup should match the soft, velvety vibe of your skin.
Soft Focus Eyes
Avoid sharp, dramatic liquid eyeliners or super shiny glitter eyeshadows. Instead, use soft matte brown shadows to gently contour your eyes. Smudge a brown pencil eyeliner along your lash line for a romantic, smoky effect that complements your smooth skin.
Blurring Lip Colors
A high-gloss lip can clash with velvety skin. Try a blurred lip look instead. Apply a creamy lipstick to the center of your lips, then use your finger or a small brush to smudge the edges outward. This creates a soft stain effect that looks beautiful and natural.
Velvet Brows
Keep your eyebrows looking soft and fluffy. Instead of drawing dark, sharp lines with a heavy pencil, use a tinted brow gel or a soft brow powder to fill in any sparse areas. This keeps the focus on your smooth, beautiful skin.
Long-Term Skin Habits for Natural Blur
While makeup can do wonders, having a great skincare routine will make achieving this look much faster and more satisfying over time.
Gentle Exfoliation
Dead skin cells can build up on your face, causing your foundation to cling to rough patches. Use a gentle chemical exfoliant, like lactic acid or mandelic acid, two times a week. This melts away dead skin cells without scrubbing your face raw, leaving a naturally smooth surface.
Staying Hydrated
Drinking enough water throughout the day keeps your skin cells plump and healthy from the inside out. When your body is hydrated, your skin naturally produces less excess oil, making it much easier to keep your makeup looking fresh and matte all day long.
Sleep Habits
Your skin repairs itself while you sleep. Getting enough rest helps reduce redness and dark under-eye circles, meaning you will need less concealer and foundation to achieve your desired look.
Common Mistakes to Avoid
Sometimes, despite your best efforts, your makeup might not turn out the way you want. Here are a few things to watch out for so you can fix them immediately.
Using Too Much Product
This is the number one reason makeup looks heavy or cakey. It is always better to start with a tiny drop of foundation and add more only where you need it. If you can see thick makeup sitting on your skin in natural light, you have used too much.
Forgetting to Wait Between Layers
If you rush through your routine, your skincare and makeup will mix together and turn into a messy paste on your face. Give your moisturizer at least two minutes to dry before applying your primer. Let your primer settle for one minute before moving on to your foundation.
Matching Your Shades Incorrectly
A matte finish highlights color differences more than a shiny finish does. Make sure your foundation matches your neck perfectly. Check your makeup in natural light near a window before you leave the house to ensure there are no harsh lines around your jaw.
Routine Comparison
To help you choose the best approach for your specific face, review this simple guide comparing the different routines based on skin characteristics.
| Skin Focus | Best Primer Type | Base Application Tool | Powder Placement |
| Oily Zones | Mattifying or oil-control | Velvet powder puff | Entire center of face |
| Dry Areas | Hydrating gel base | Damp makeup sponge | Sides of nose only |
| Large Pores | Pore-filling silicone | Pressing finger motions | Directly over pores |
| Normal Skin | Smoothing fluid base | Light stippling brush | Light dusting overall |
Product Selection Guide
Use this reference list to understand what ingredients and textures work best for creating a cloud-like finish.
- Look For: Glycerin, silicone, silica, translucent minerals, water-based gels, velvet finishes, satin textures.
- Avoid: Heavy mineral oils, high-shine glitters, thick wax concealers, ultra-drying alcohols, metallic shimmers.
- Key Textures: Soft creams, liquid-to-powder formulas, micro-milled loose powders, lightweight skin drops.
Frequently Asked Questions
Can I get a soft-matte look without using any foundation?
Yes, you can easily do this without a full face of foundation. You can use a blurring primer on your shiny zones, spot conceal any red areas or blemishes with a small brush, and then apply a light dusting of translucent powder over those specific spots. This keeps your skin looking incredibly fresh while still controlling shine.
Why does my makeup look cakey after I apply my loose powder?
Cakeyness usually happens when there is too much powder or when your skin is too dry underneath. Make sure you are using a damp sponge or a velvet puff, and always tap off the excess product before touching your face. Also, ensure you are using a light gel moisturizer before starting your makeup so the powder has a smooth base to rest on.
How do I stop my makeup from separating on my nose during the day?
Makeup separation usually happens when your primer and foundation do not match. If you use an oil-based foundation with a silicone-based primer, they will repel each other and separate. Check your product ingredients to ensure they are both water-based or both silicone-based. Additionally, using a pore-filling primer specifically on the nose will help hold the makeup in place.
Is a soft-matte finish suitable for older skin with fine lines?
This style is actually wonderful for mature skin because it avoids the flat, drying look of traditional matte products. By using a light hydration routine first and only applying powder to the very center of the face, you can blur the appearance of fine lines without causing the makeup to settle into wrinkles.
What should I do if my skin starts looking too shiny after a few hours?
Do not pile on more heavy compact powder throughout the day, as this will lead to a cakey look. Instead, carry oil-blotting papers in your bag. Gently press a sheet of blotting paper against your shiny zones to absorb the excess oil without disturbing your makeup. If you need to, you can follow up with a tiny pat of translucent powder using a clean puff.